Gitlab Continuous (CI/CD) with an Azure Web App
Recently I came across a case with helping a customer configure Gitlab with Azure web app using continuous integration. App Services support Git repositories from Bitbucket, Github, and VSTS Git natively but Gitlab requires a bit more manual setup.
Referenced these two helpful blogs
https://christianliebel.com/2016/05/auto-deploying-to-azure-app-services-from-gitlab/
https://teerachail.gitbooks.io/the-s-sentials/content/gitlab2appservice.html
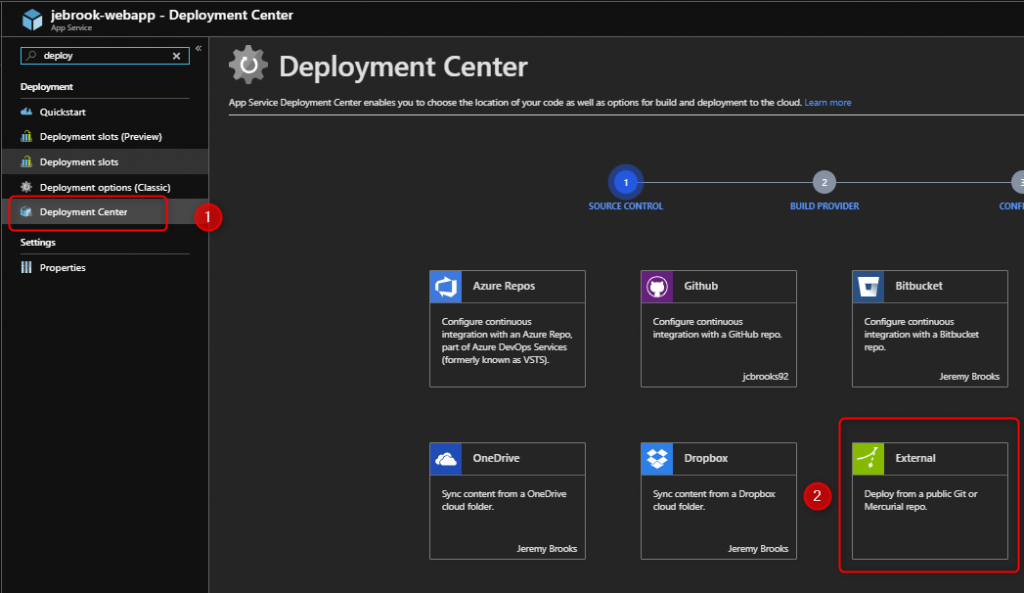
- Go to the Azure portal under your web app -> Deployment Center -> External Repository -> continue
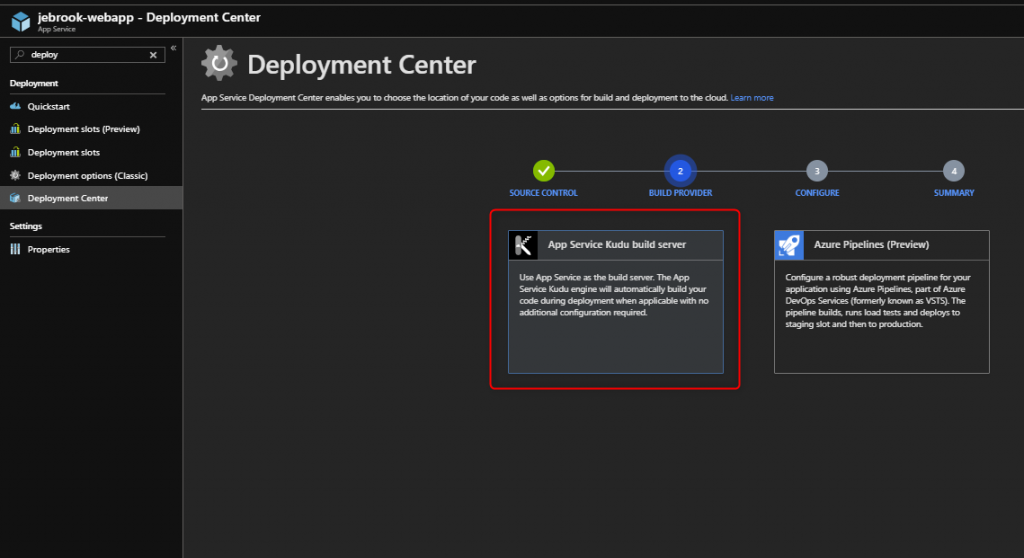
2. Select your Build provider. Kudu is currently the default and Generally Available option (Production usage ready) -> Continue
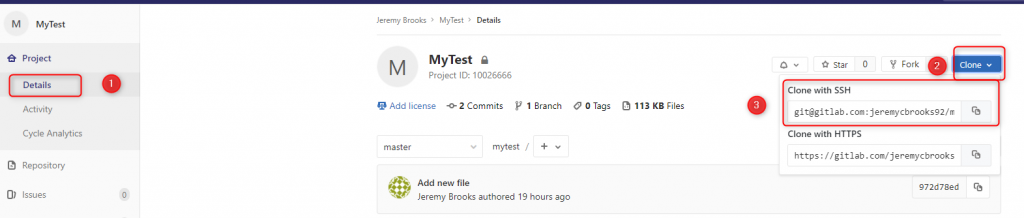
3. From Gitlab, paste your repository URL which will look like git@gitlab.com:jeremycbrooks92/mytest.git. You can pull this URL from your Gitlab repository under Details -> Clone -> Clone with SSH.
**Update 5/2021 – Updating this screenshot to show the current view. You’ll want to set the repository to “Public ” instead of “Private” since the connection is using SSH instead of HTTPs. The Private option utilizes basic authentication whereas with Gitlab SSH auth is needed.
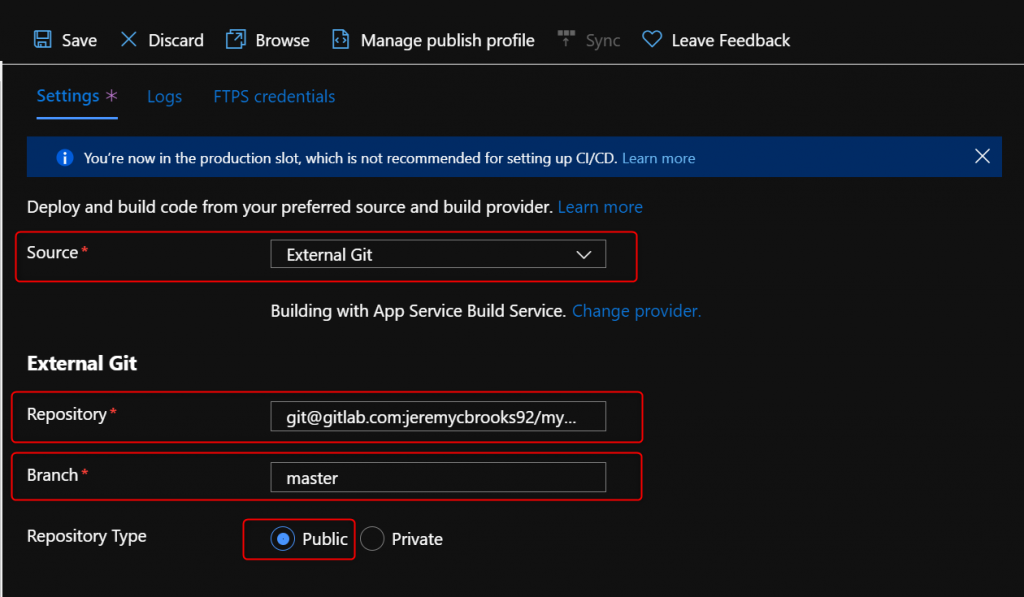
4. Finally select the Branch you’d like to configure this with. The default is usually master.
5. Click Continue and if everything looks good click Finish. The deployment will fail if this is private repository as we haven’t configured authentication for the repository so proceed with the next steps.
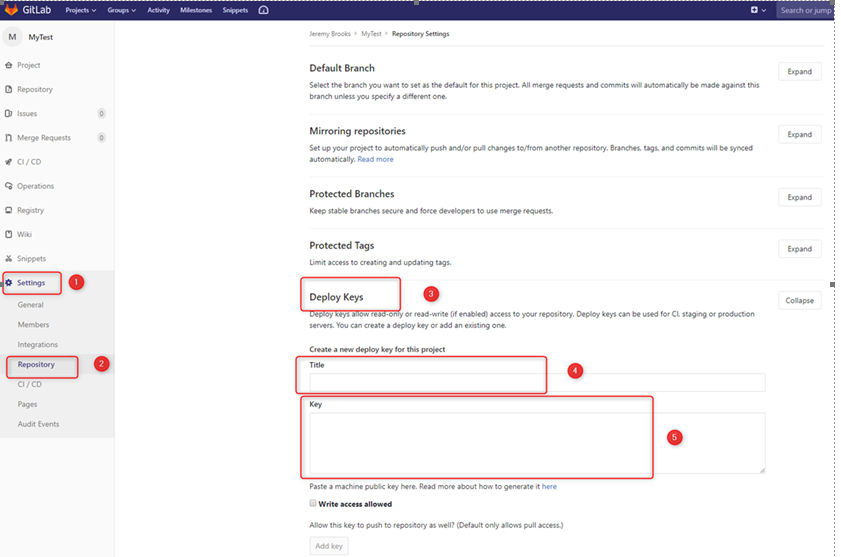
6. Navigate to https://yourappname.scm.azurewebsites.net/api/sshkey?ensurePublicKey=1 get the token. Yourappname is the name of the app service resource you created in the portal.
8. Copy the token from the URL above not including the quotation marks. It will start with ssh-rsa <long string>

9. Navigate to your project in Gitlab -> settings -> Repository -> Deploy Keys – > Title : Give it some title -> Past the Key in the Key box from step 1. Lastly click add key.
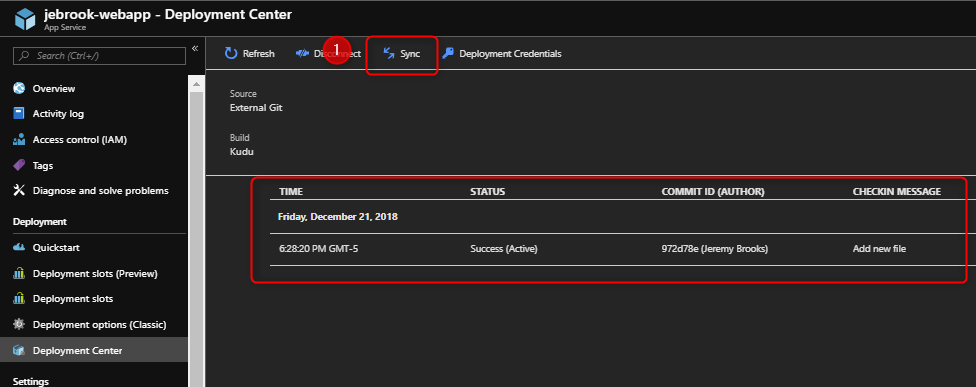
10. Navigate back to the Azure Portal and try to click the sync button. If everything is configured correctly you should see Pending -> Then messages about the deployment starting
11. If the sync is successful the last step is to configure the webhook on the Gitlab repository side so whenever a commit is made, the repository can alert the web app to make a new pull request with the new code. If this step fails validate that you have set up the SSH key correctly and maybe wait a couple more minutes.
12. Navigate to the Properties blade of the web app copy the deployment URL. The URL contains a user name and password to access the SCM (Kudu) endpoint so don’t share it with people who shouldn’t have access to manage the app

13. Copy the URL and navigate back to Gitlab’s webhook section: Settings -> Intergrations
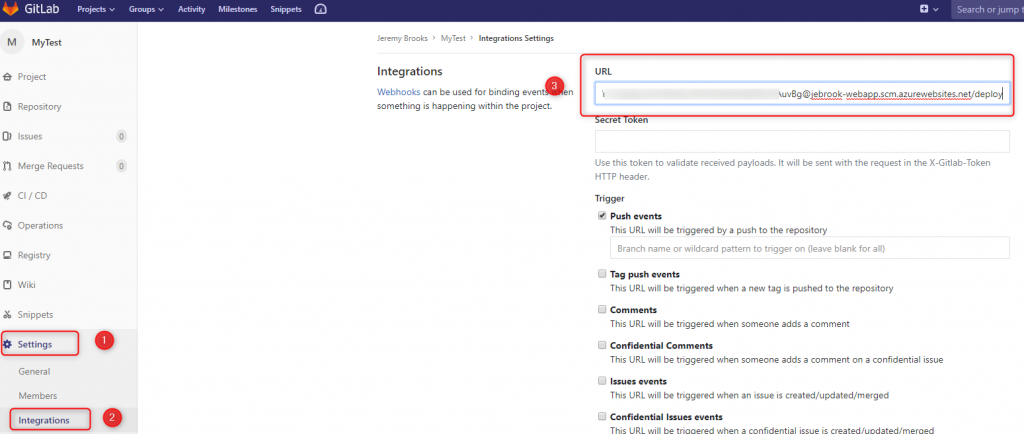
14. Click Add webhook
14.Now test out by committing something to the repository and that should kick off a deployment automagically on the web app showing your updated code one the deployment is completed.
I hope you found this tutorial helpful. This blog is an extension of these two blogs showing the new deployment center user interface.
https://christianliebel.com/2016/05/auto-deploying-to-azure-app-services-from-gitlab/
https://teerachail.gitbooks.io/the-s-sentials/content/gitlab2appservice.html
Good guide, very descriptive.
Thank you Jeremy
A very good explanation. But some sections are outdated and do not work. For example, “Deployment Triggger
URL” does not exist in the new version of Azure. So the explanation does not work.
Hi Sandra. That’s correct this is potentially outdated since it was written 2018. Here’s a document that covers the trigger. https://github.com/projectkudu/kudu/wiki/REST-API#deployment